10 Tips for Organizing Your Creative Space
I am often asked about the methods I use to organize my creative space. In two recent Creatives Get Real podcast episodes, my co-host Sandi Keene and I tackled this topic. We shared ideas for tidying up our spaces as well as organizing our art supplies.
—> 19: Organizing Creative Spaces - Part One
—> 20: Organizing Creative Spaces - Part Two
This prompted me to create a blog post from some free content I offer geared toward how I did an overhaul of my studio space and ideas for getting things organized. There may be references to a “free course” and that is what I am referring to. I am bringing all content to you, including free downloads to help you.
The Backstory
There’s an old saying a messy work space is a sure sign of genius, and thinking that way got me through many projects. With a passion, I would jump into new endeavors without really recovering from my finished ones, because after all, “I was creating!” So, I thought, who has time to clean?
But, whether it was an act of finally maturing, or, to tell the truth, the fact that I started buying new tools because I couldn't find the old, I realized my art space needed a makeover. And, I had to draw the line to discipline my sweet inner artist, because, frankly, no one else was there to do it for me. It wasn’t easy!
After I thought about how I feel with things out of place, I realized my enthusiasm to create and the spontaneity of my ideas was lagging behind my desire to start new projects. I caught myself dreading going into my studio space, because there wasn’t room to work, and the time it would take to make a surface ready was too stressful to deal with. I was weighed down by the disorder, thinking it didn’t matter, but at the same time, at the back of my mind, wishing my space inspired me and wasn't such a mess.
I had to make drastic changes to get to a solution and while this post won’t show you a magic trick for doing the same with your creative space, I hope the ideas I share will inspire you and get you excited about looking at your creative space with new eyes!
Video is the only way to show you the before and after of the studio.
“The secret of all victory lies in the organization of the non-obvious.”
At Arm’s Reach
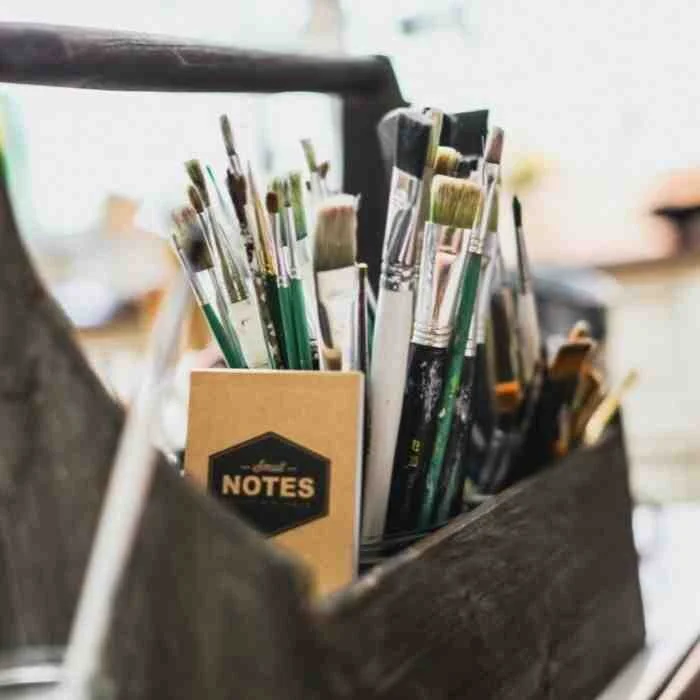
Today I want to show you how I organize my brushes, pens and tools so they are within quick reach while I am working. I keep my favorites nearby and the rest are located in little bins off of my work table. It is important that I have plenty of space to spread out while I work so having brushes, pens and a few tools within reach while the rest of the table is clear works best for me.
I found this wooden tool box at TJ Maxx. I love that it has a handle so it can be easily moved. I added small cups and mugs to the inserts so I can remove my brushes, pens or tools easily. Consider old sewing machine drawers, pitchers, utensil organizers, baskets and jars for storing your brushes and tools.

I have a weakness for fancy mugs and pottery and love using them for my pens, crayons and pastels. Mugs, bottles, jars and juice glasses are also good choices. I like that I can carry them into another room or outside if I want to work in a different space.


Rounders and Cubbies
My favorite organizational tool was found at Home Goods. I am not sure what these are called, but I refer to them as the "cubbies," because of all the individual pull out drawers. It is super convenient to pull out the drawers and carry them to where I am working. This display shows two stacked together.


Think outside the box when looking for storage pieces. I like Home Goods, Tuesday Morning, Etsy, Hobby Lobby, TJ Maxx, World Market, Bed, Bath & Beyond, Target, IKEA, yard sales, flea markets, vintage markets, second hand stores, etc.


Metal and/or wood “rounders” are perfect for not only storing but showcasing pretty tags, little cards, clips, small pieces of art and more. Other ideas include: serving trays, hanging shoe racks, clipboards, key hang boards, baskets, crates or utensil organizers
Hang and Display
Confession time: How many rolls of washi tape do you own? Do you buy aprons because they are beautiful, but don’t wear them for fear you might get paint on them?
For me, I have lots of Washi tape, but am embarrassed to say how many and yes, I have some pretty aprons I never wear. They are hanging in my studio so I can admire them.

There are lots of ways to showcase/store your washi tape collection. I like using vintage wooden spools because they are perfect for washi tape, are vintage and easily portable. Washi tape looks great in baskets, bowls, boxes, saucers, ramekins, metal holders and fancy boxes.


My aprons are hanging on vintage pieces of wood moulding with old door knobs attached. I love that they match my furniture and fit the overall feel of my art space. Art aprons are too pretty to keep hidden. Other ideas for showcasing your aprons include: racks, hooks, rods, clipboards and boards with hooks.
More on my handmade apron HERE.
Hidden and Displayed
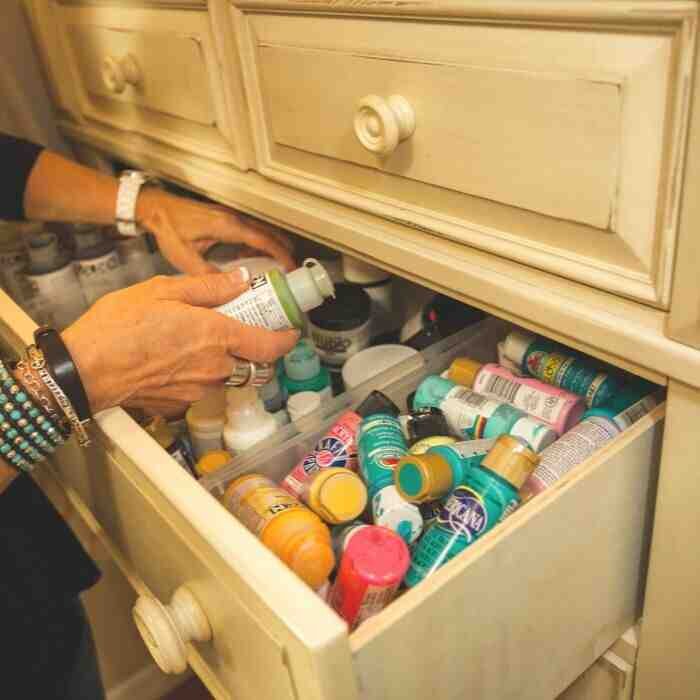
One thing I realized about the way I like to create is that some of my supplies need to be visible to me while others need to be hidden. For me, if too many things can be seen, then I become overstimulated and distracted. So, for my paints, some are displayed in a “pretty” way and the rest is hidden in easily accessible drawers.

Tiered displays are very functional and since they are vertical in design, don't take up a lot of space. Consider making one of your own using metal baking pans or wire baskets and wooden candle holders. I have seen these at gift shops, Target, Home Goods and World Market.
Check out these tutorials on how to make one of your own.
The dressers I use in my studio were found at Rooms to Go and Big Lots. I love these dressers because they give the studio a homey, cozy feel while providing ample storage space that is hidden from view. If your space is limited and large pieces won't work, keep your eyes open for other options like wooden boxes, vintage colanders, large ceramic bowls, picnic baskets and hat boxes.
Push and Grab
"Grab and Push" is NOT a lesson on how to shop Wal-Mart on Black Friday! LOL!
Push and grab is about wheeled carts and mobile storage.
I found this mobile cart at World Market but they can be found everywhere. In order to keep my work table clean and organized I knew I wanted to have a way to move the paints and other things that I use regularly to wherever I am working. This three-level mobile cart is perfect. On the first level I have paints of varying brands. The second level holds more paints and the last level holds paper towels, baby wipes, and tools.


Vintage wood boxes such as sewing machine drawers, divided storage boxes, card catalog drawers and small crates are not only beautiful but functional. I like the wooden box shown in the top photo, because it features two dividers and an angled and open front. It is perfect for storing little envelopes, shipping tags, little art pieces, cards and more and is small enough to be portable.
Another Look at the before and after
I thought you might like to see some "in process" photos of how the big clean up and redo of my studio actually looked.
Be prepared for something very dreadful! LOL! I put together a photo gallery HERE so you can really visualize how it looked as I worked.
Want to see me "pull back the curtain" and walk you through the studio?
“I’ve got a theory: if you love your work space, you’ll love your work a little more.”
Tips to Get Started
•Deep clean and purge.
-Donate items that you have an abundance of or do not use.
-Sweep, dust and conduct a thorough cleaning. If you can remove everything from your space that is a great start but is not necessary.
• Don’t wait to find the perfect pieces for organizing and storing... start now!
•Consider how you work best: Do you like your supplies close at hand? Do you like being able to “see” everything or do you prefer to have things tucked away?
•There is no right or wrong way to organize your art space. A system has to work for YOU.
•Don’t pile things up and tell yourself you will do it later - put things away immediately! Better organization means less time looking for things and more time creating!
Ready, Set, Go!
Let me challenge you to take steps today to “beautify” and organize your art space. I wish I had done it sooner. I would love to see the ways you organize your space so reach out!
Have fun!
roben-marie
Free Downloads

Click Image to Download

Click Image to Download